Surf Maneuvers Series PART 4: Floaters and Foam Climbs
Share
Surf Maneuver Tip 4: Floaters and Foam Climbs
Surf Maneuvers Series by Hawaiian South Shore:
- Surf Maneuvers Series Tip 1: Taking Off on a Shortboard
- Surf Maneuvers Series Tip 2: Pumping Down the Line
- Surf Maneuvers Series Tip 3: Bottom Turn/Top Turn Combo
- Surf Maneuvers Series Tip 5: Roundhouse Cutback
- Surf Maneuvers Series Tip 6: The Down Carve
- Surf Maneuvers Series Tip 7: Layback Snap
In recent years, the air reverse has largely replaced the floater/foam climb as a finishing move, adding a bit of extra flair to sections that used to be approached with what was largely a utilitarian design. But despite the trend toward above-the-lip maneuvers, the utility of the floater has not been diminished, particularly in situations where you are surfing from behind a long foamy section or lip line.
Video credits to World Surf League
Perhaps the biggest difference between today’s floaters and those of the late 1990s is that the best surfers now only use floaters when necessary, whereas, in the pre-air era (or at least before virtually every semi-pro on the planet could throw air reverses at will), floaters were used to punctuate closeouts (a role that is now largely the domain of the aerial). But while floaters might not win heats on the world tour anymore, they are still relevant today—particularly for us more pedestrian surfers who aren’t boosting every time a section stands up.

Ideally, floaters and foam climbs (which are largely the same thing, with only a few small differences) are used to flow through and over long sections with both flash and function, rather than bottom turning around the section and wasting both speed and the opportunity to shred. Technically speaking, a floater is any maneuver that sees the board transferring up onto the outside/top of the falling lip, whereas a foam climb involves predominantly the same approach, but rides up and over a foamy section rather than an actual lip. Both maneuvers require speed, lateral projection down the line, and a nimble, lightning-quick approach that blends power and balance with being light on your feet.
As you drive down the line toward a long section that lends itself to a floater or foam climb, perform an abbreviated bottom turn that projects you up the face at an angle, rather than straight up into the lip. The idea here is to maintain your down-the-line speed while still getting your board moving upward enough to rock-and-roll up onto the lip or over the whitewater.

Rather than keeping the board on rail, transition to the bottom planing surface, as if you were performing a 50-50 grind on a snowboard or skateboard. The tail will often drift downward as the fins disengage from the lip or foam section, particularly when doing a backside floater, but the speed and planing surface of the board will keep the nose moving both upward and down the line. Depending how long the section is, you may only “float” for a split second, or you may find the board sort of “pumping” over the section on its own. Either way, the trick is to keep your weight evenly distributed over the board and maintain your speed throughout the maneuver.
As the board begins to lose momentum and fall from the lip or foam section, redirect your weight down toward the trough so that you control the landing, rather than having the wave dictate where you end up. Do your best to land on the back foot first, as this will keep the nose from pearling and allow the fins to reengage so that you can once again begin to generate speed. When performed correctly, you will reengage with the trough or wave face just as your speed begins to diminish, but with enough time to drive straight into your next pump or maneuver so that there is no major loss of forward momentum. As the board reengages with the face, make sure that you transfer weight back to the inside rail, otherwise you are likely to spin out or find yourself unable to generate more down-the-line speed.
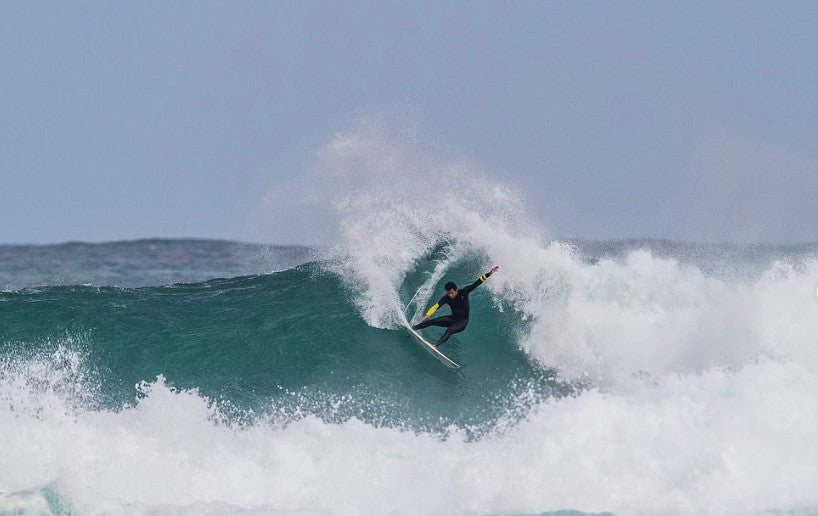
While the floater has become a maneuver more focused on function than flash, there are ways to spruce it up and give it an extra layer of pizzaz. Guys like Mason Ho and Kalani Robb have been known to toy with their floaters, performing silly yet impressive variations while weightless on the lip. Mason will sometimes cross-step toward the nose of his shortboard while mid-floater, then cross-stop back just before falling out of the lip. Felipe Toledo has also been known to pull this variation, even performing it in a world tour heat. Kalani Robb, meanwhile, spent a large part of the late 1990s doing floater-to-360 combos where he delayed his descent from the lip, then, at the last minute, capitalized on the fact that the fins were disengaged and spun the board back toward the pocket as he fell out of the lip, essentially doing a board slide 360 and completing the rotation as he reengaged with the trough of the wave.

Photo credits @filipetoledo
It should come as no surprise that the large the wave and the heavier the section is, the more difficult and dangerous a floater is to perform. Since you are losing speed while riding on the outside of the lip, it stands to reason that a hollower, heavier wave would drop you more violently toward the trough at the end of the maneuver, where you are likely to get blown up by the bounce. For this reason, we suggest only attempting floaters on smaller waves (below head high) that aren’t extremely hollow. Of course, that isn’t to say that there aren’t people out there attempting floaters on big and even huge waves. A number of huge floaters have been performed at triple-overhead Sunset during the annual contest, and Lucas “Chumbo” Chianca actually got injured attempting a floater in the shore break at Waimea Bay during The Eddie—yes, on a 10'0" gun!
For most of us, however, the floater will likely remain a connecting move that is used to bridge sections on fast, down-the-line waves—or to climb up and over foamy sections as we maintain our momentum with just a little bit of extra flair.
